Getting Started with NSLayoutAnchor (Swift 4.0)
June 17, 2017
Displaying views correctly on the screen can be one of the most frustrating parts of building apps. With the addition of more screen sizes, it's not getting any easier. Thankfully, Apple is also offering us more ways to work with auto layout. Here I'm gonna take an introductory look at the an API introduced in iOS 9, NSLayoutAnchor. I'll show how it improved the ideas from NSLayoutConstraints and how to use NSLayoutAnchor in your app.
- Xcode: 9.0
- Swift: 4.0
Why NSLayoutAnchor?
Where do we begin? There seems like a dozen ways to layout things. You can use interface builder, stack views, visual format, and last but not least anchors. There's no one perfect way to use auto layout. If you're creating constraints in code you'll probably use either NSLayoutConstraints or NSLayoutAnchors. Here's what NSLayoutConstraint and NSLayoutAnchor look like side by side doing the same thing.
//NSLayoutContraints
// [1]
let viewContraints = [
  NSLayoutConstraint(item: myView, attribute: .top, relatedBy: .equal, toItem: self.view.safeAreaLayoutGuide, attribute: .top, multiplier: 1.0, constant: 0),
  NSLayoutConstraint(item: myView, attribute: .leading, relatedBy: .equal, toItem: self.view, attribute: .leading, multiplier: 1.0, constant: 0),
  NSLayoutConstraint(item: myView, attribute: .trailing, relatedBy: .equal, toItem: self.view, attribute: .trailing, multiplier: 1.0, constant: 0),
  NSLayoutConstraint(item: myView, attribute: .height, relatedBy: .equal, toItem: nil, attribute: .notAnAttribute, multiplier: 1.0, constant: 100)
]

// [2]
NSLayoutConstraint.activate(viewContraints)

// NSLayoutAnchor
// [3]
myView.topAnchor.constraint(equalTo: self.view.safeAreaLayoutGuide.topAnchor).isActive = true
myView.leadingAnchor.constraint(equalTo: self.view.safeAreaLayoutGuide.leadingAnchor).isActive = true
myView.trailingAnchor.constraint(equalTo: self.view.safeAreaLayoutGuide.trailingAnchor).isActive = true
myView.heightAnchor.constraint(equalToConstant: 100).isActive = true
- This is an array of NSLayoutConstraints that I called viewConstraints. I'll use it to hold my constraints but the real reason I created it is to activate all my constraints together.
- I'm activating all of my constraints at once using NSLayoutConstraints method activate that takes an array of NSLayoutConstraints.
- These four lines of code do the same thing as all the above code.
The code above can be broken into two parts of NSLayoutConstraints and NSLayoutAnchor. When you use them individually you'll get the following result from both.

There are two distinctions I'd like to make between using NSLayoutConstraint and NSLayoutAnchor. One is obvious and the other not so much until you do something wrong.
Readability
You might disagree with me on this but the NSLayoutAnchor code is much easier to read. It's amazing how NSLayoutAnchor constraints require less code and still appear easier to read. Just to prove a point I'll take the above NSLayoutAnchor code and take it one step further.
// Constant to cut out repeat code
let safeArea = self.view.safeAreaLayoutGuide

// NSLayoutAnchor
myView.topAnchor.constraint(equalTo: safeArea.topAnchor).isActive = true
myView.leadingAnchor.constraint(equalTo: safeArea.leadingAnchor).isActive = true
myView.trailingAnchor.constraint(equalTo: safeArea.trailingAnchor).isActive = true
myView.heightAnchor.constraint(equalToConstant: 100).isActive = true
I didn't do much except add a safeArea constant to represent some repeated code. I could also remove the "self" keyword but I like to use it for clarity.
Type Checking
The NSLayoutAnchor class has three subclasses called NSLayoutXAxisAnchor, NSLayoutYAxisAnchor, and NSLayoutDimension these classes provide type information to methods inherited from NSLayoutAnchor. So what does that mean? Let me show you.
// The compiler will throw an ERROR here before compile Time
// ERROR: Cannot convert value of type 'NSLayoutYAxisAnchor to expected arugment type 'CGFloat"
myView.heightAnchor.constraint(equalToConstant: self.view.bottomAnchor).isActive = true
The above error would let us know before compile time that the code won't work. The method is expecting a CGFloat type and we're giving it the NSLayoutYAxisAnchor type instead that isn't significant when setting a height anchor.
When I write equivalent code using NSLayoutConstraint it looks like this.
  // This code won't produce an error until run time
NSLayoutConstraint(item: myView, attribute: .height, relatedBy: .equal, toItem: self.view, attribute: .bottom, multiplier: 1.0, constant: 0)
Still ugly but the biggest difference is this code doesn't give me an error until run time. That's not a huge issue when you don't have many constraints but any iOS programmer will tell you constraints can be a pain to debug.
With those formalities out of the way I hope you're convinced NSLayoutAnchor is worth learning. I'll show you next how to create basic constraints using NSLayoutAnchor.
Creating NSLayoutAnchor Constraints
First, we need a view. I'm using a plain UIView but you could do the same thing on any UI element. I'll be placing the following code inside of viewDidLoad() for convenience.
let myView: UIView = UIView(frame: .zero)
myView.backgroundColor = .red
myView.translatesAutoresizingMaskIntoConstraints = false
self.view.addSubview(myView)
let safeArea = self.view.safeAreaLayoutGuide
Next, adding and activating constraints on our new view. UI elements come with a variety of anchor points we can use to constrain elements. We'll only be using four but you can find all the other constraints in Apple's documentation here.
// [1]
myView.topAnchor.constraint(equalTo: safeArea.topAnchor).isActive = true
myView.leadingAnchor.constraint(equalTo: safeArea.leadingAnchor).isActive = true
myView.trailingAnchor.constraint(equalTo: safeArea.trailingAnchor).isActive = true
// [2]
myView.heightAnchor.constraint(equalToConstant: 100).isActive = true
- First, we pick an anchor point. We'll use .topAnchor for this one. Next, we select the type of constraint to place on the anchor. We'll be doing a simple equalTo constraint because we want the view to be constrained to the topLayoutGuide's bottomAnchor.
- This constraint is slightly different but all it does is set the height of the view to 100.
The above code can seem scary but when you compare them to each other you see that only a couple things get changed in each line. Here's a basic layout for making these anchors.
// View.ViewsAnchor.HowToConstrainTheAnchor(equalTo: WhatToConstrainTo).isActive = true
You have a lot of options for making these constraints. You can view Apple's documentation on NSLayoutAnchor here. The documentation is very extensive and shows just how robust the NSLayoutAnchor API is.
With all of that done we should be set. Before you build and run though you can check that your viewController looks like mine.
class ViewController: UIViewController {
  override func viewDidLoad() {
    super.viewDidLoad()

    let myView: UIView = UIView(frame: .zero)
    myView.backgroundColor = .red
    myView.translatesAutoresizingMaskIntoConstraints = false
    self.view.addSubview(myView)
    let safeArea = self.view.safeAreaLayoutGuide

    myView.topAnchor.constraint(equalTo: safeArea.topAnchor).isActive = true
    myView.leadingAnchor.constraint(equalTo: safeArea.leadingAnchor).isActive = true
    myView.trailingAnchor.constraint(equalTo: safeArea.trailingAnchor).isActive = true
    myView.heightAnchor.constraint(equalToConstant: 100).isActive = true
  }
}
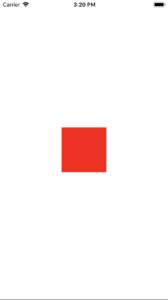
If your code looks like mine then press build and run the project.
It's a boring view I admit but you can now do so much more. I highly encourage reading the documentation to learn just what all you can do with NSLayoutAnchor.
Optimization
When you write NSLayoutAnchor code enough it can become monotonous to write .isActive = true at the end every time. NSLayoutConstraint has a class method called activate() that expects an array of NSLayoutConstraints so I'll commonly just place my new constraints in there like this.
NSLayoutConstraint.activate([
  myView.topAnchor.constraint(equalTo: safeArea.topAnchor),
  myView.leadingAnchor.constraint(equalTo: safeArea.leadingAnchor),
  myView.trailingAnchor.constraint(equalTo: safeArea.trailingAnchor),
  myView.heightAnchor.constraint(equalToConstant: 100)
])
Now it's impossible to forget activating your constraints. Plus you write less code this way :p . Smart or lazy? You decide. All pretty simple so far? Keep following along and I'll show you a few more cool things about NSLayoutAnchor.
Centering myView
We'll do something similar here but with the new optimization.
NSLayoutConstraint.activate([
  myView.centerXAnchor.constraint(equalTo: self.view.centerXAnchor),
  myView.centerYAnchor.constraint(equalTo: self.view.centerYAnchor),
  myView.heightAnchor.constraint(equalToConstant: 100),
  myView.widthAnchor.constraint(equalToConstant: 100)
])
The code should look relatively similar to earlier. Since our superView has a centerXAnchor and centerYAnchor we just constrain myView to the superView anchors. The biggest difference is I'm setting both the width and height of this view. That's because I didn't anchor it to the superView edges so I must explicitly declare what those dimensions will be.
With that complete, we'll move onto placing myView on the bottom of the screen.
Anchoring to the Bottom
In this last example, we'll look at adding constants to the anchors. The basic layout of making the anchor will be the same but the method will be constraint(equalTo: _, constant: _) instead. Here's what it looks like.
NSLayoutConstraint.activate([
  myView.bottomAnchor.constraint(equalTo: safeArea.bottomAnchor, constant: -20),
  myView.leadingAnchor.constraint(equalTo: safeArea.leadingAnchor),
  myView.trailingAnchor.constraint(equalTo: safeArea.trailingAnchor),
  myView.heightAnchor.constraint(equalToConstant: 100)
])
You might think that adding a -20 would push myView down or to the right but that's not the case. Since the origin(0,0) for the superView is the top left it actually brings myView up and looks like this.

Without that constant myView would sit on the bottom without a margin. You can find out for yourself by changing the constant to 0. If for some reason your view is still in the center remember to update the activeConstraints and that should fix your problem.
To keep learning about NSLayoutAnchor I have another post about Animating NSLayoutAnchor Constraints and the Pitfalls Involved. Go take a look and leave a comment when you're done. :)
I hope you found it helpful. If you did please share it with somebody you think could benefit. If you have any comments please leave one here or reach out to me on twitter @josh_qn.
Thanks again. Auf wiedersehen!